
HJ and I have had this sad IKEA Malm headboard for the past 3 or so years. It was only $25.00 on Clearance, because they discontinued the finish (not surprised, it’s soooo boring…)

I had always planned on doing something else with it, but just couldn’t decide what I would like best. So a few weeks ago, HJ and I went to the fabric store and bought 2 layers of batting and a textured linen fabric, for less than $50 bucks. Score! 🙂
Here’s how we did the transformation:
1. We read a ton of other blogs that did it before 🙂
2. We measured and added about 5 inches to the sides and top so we would have enough fabric and batting to wrap around the sides to staple
3. We knew we wanted to do a nailhead trim, and several blogs said that the shank of the nailhead wouldn’t pass through thick batting. So, we cut the first layer of batting 1″ smaller all around the top and sides to give padding to the center only. Then, we spray-mounted it in place. We did this step in our well-ventilated storage space in our apartment building, so we wouldn’t ruin our floors or furniture

4. Then we wrapped the second layer of batting all the way around and stapled it to the back. We started in the center and worked our way out, as suggested in a few blogs. We also trimmed around the mounting hardware

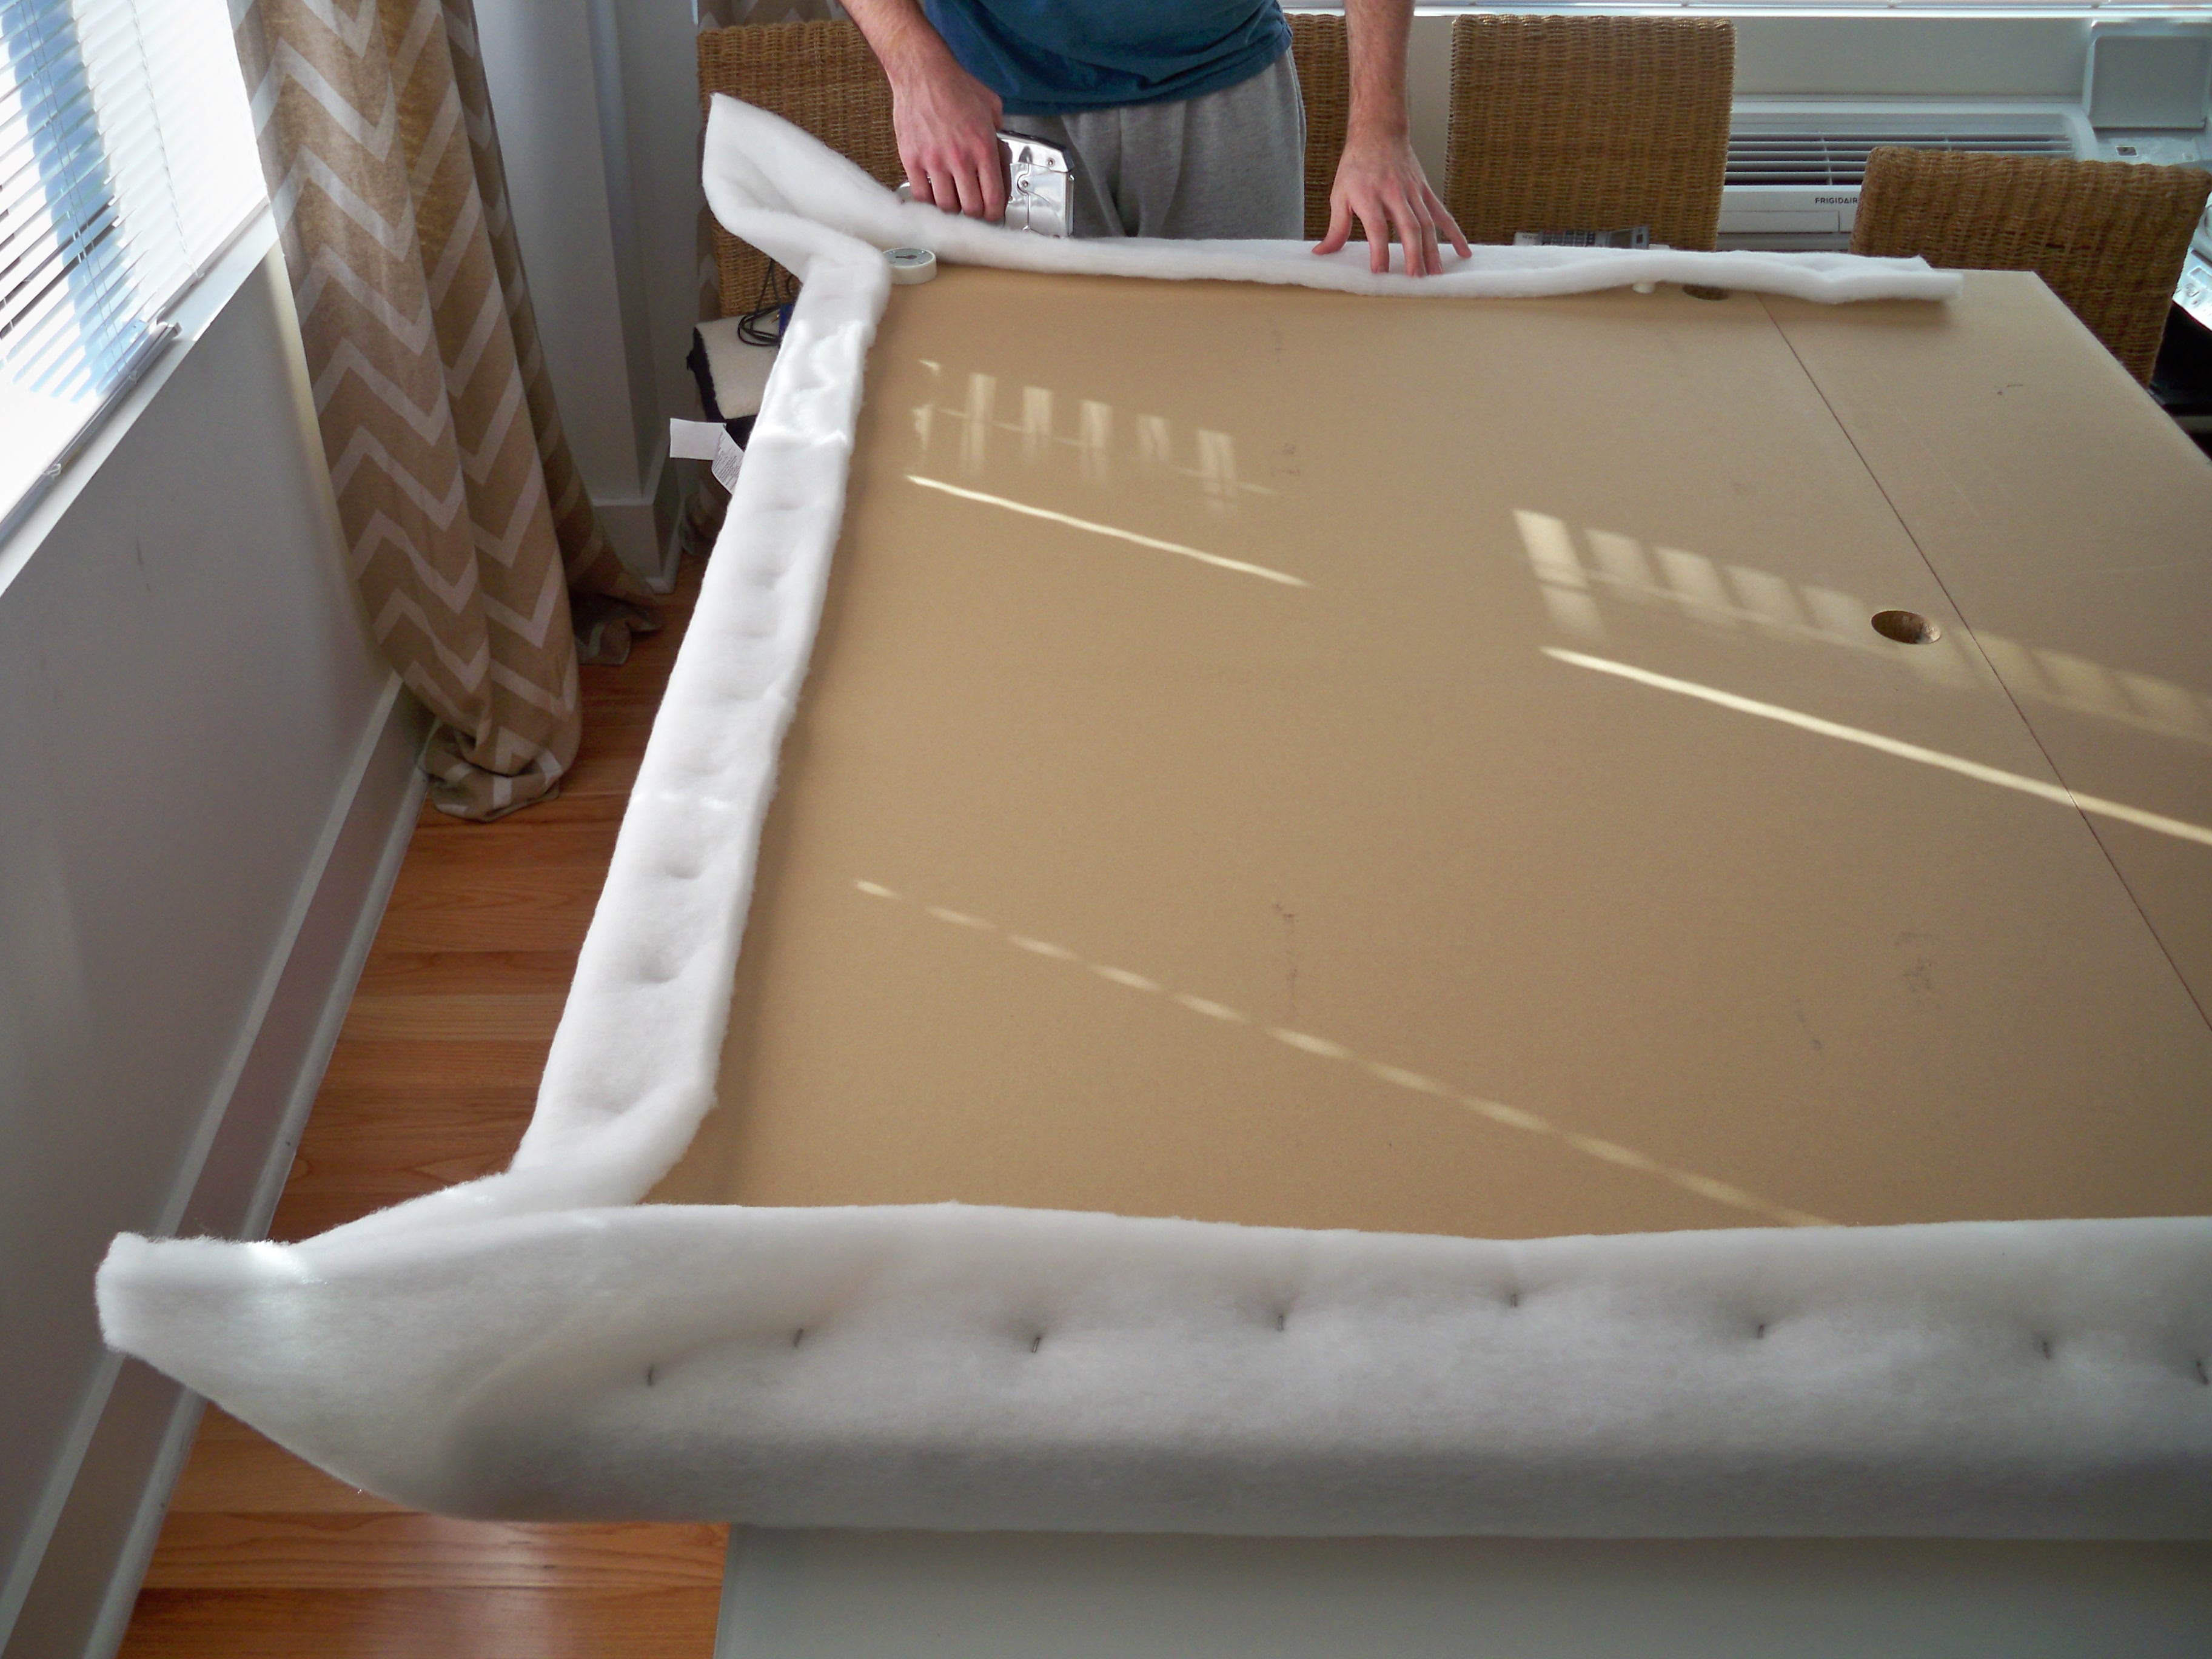
5. Next, we just kinda guessed when we did the corners…basically, we cut the extra fabric off and left enough for there to be fluff around the edge


6. Before we wrapped the fabric, I made sure to give it a good ironing
7. We laid the headboard finished side up, so that we could make sure the fabric lines were straight. We stapled a few staples in the center of each side and top so that the fabric would be secure when we flipped the headboard over to finish stapling. See the nice “tufting” that was created on the back of the headboard with the staples? I really love that effect and wish that we could do it on the front, except that we don’t have anything to hide the staples…hmmm…?

8. HJ folded the corners nice and crisp so that I would have nothing to obsess about 🙂

9. The fabric and batting didn’t come in a width that was going to cover the entire headboard, but that was OK, because we knew it wasn’t going to be visible. So we just stapled the fabric and batting to the front, no problem!

10. Ideally, this is where we would have used our new rubber mallet to hammer in the nailhead trim, but we just ordered it today from here

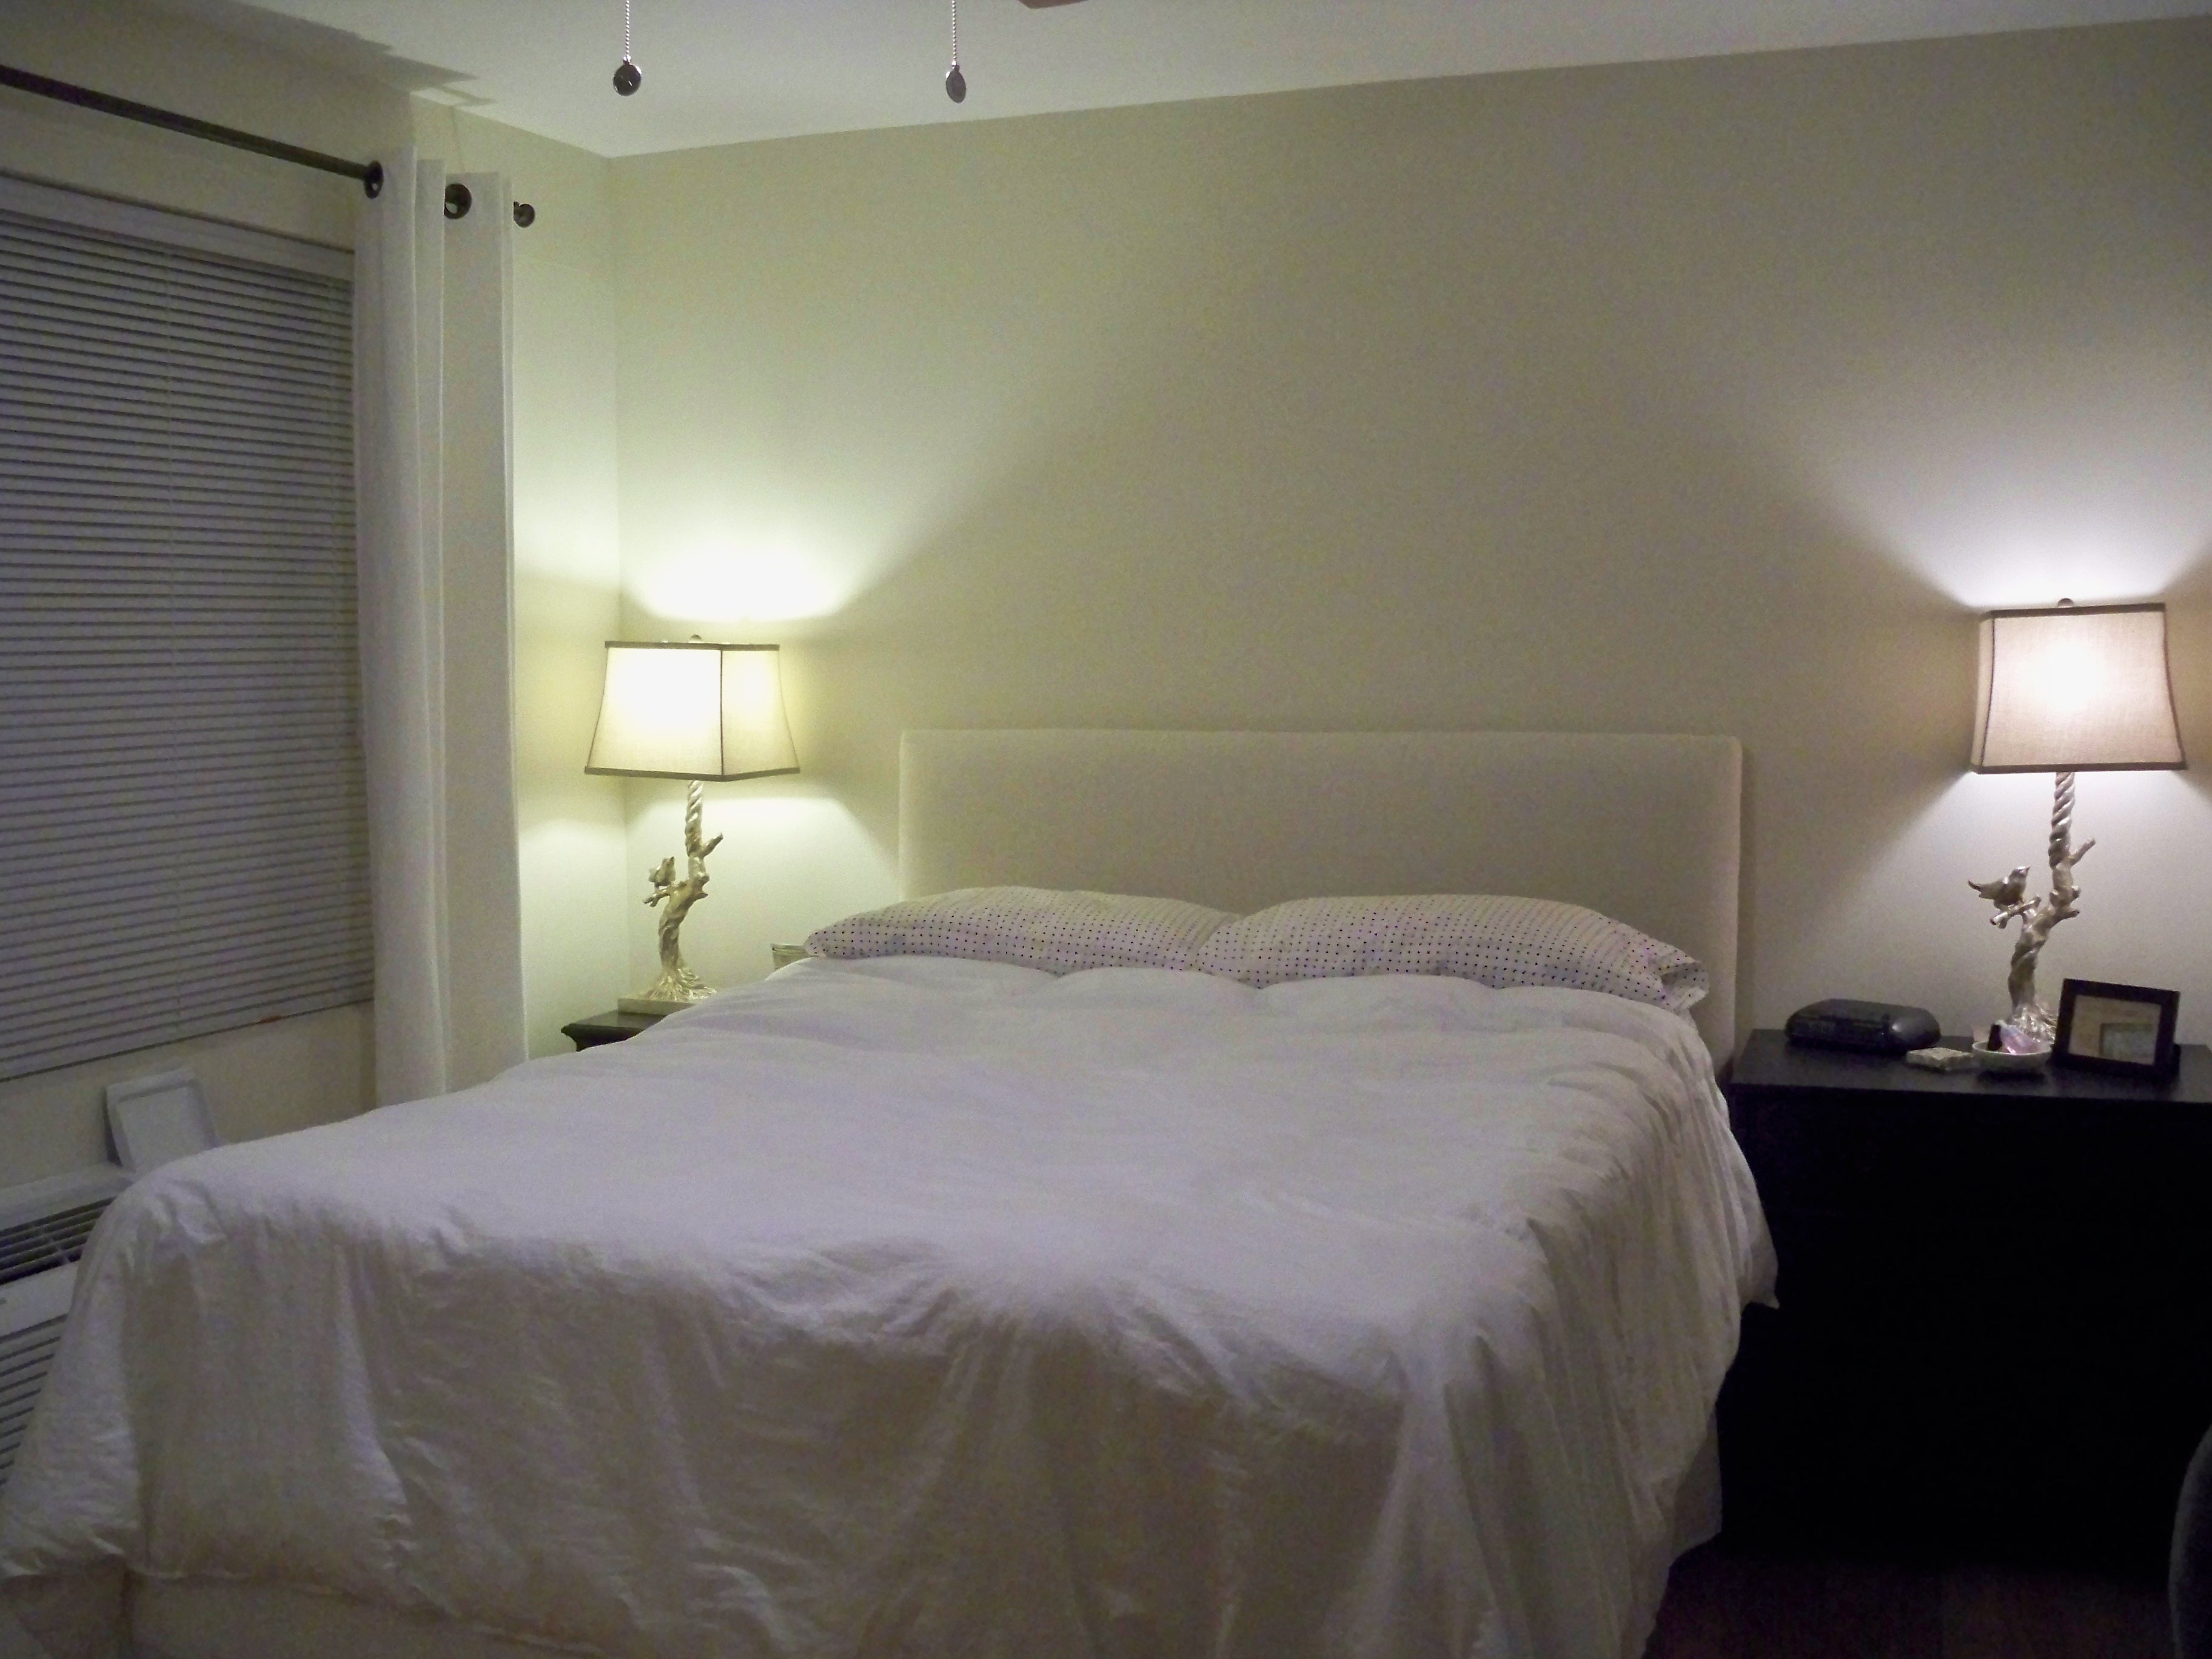
We got too excited to see the *almost* final result, so we put it back into place and will put the finishing touches on it as soon as our trim arrives in the mail!
And the before again, just for fun:
Once everything is finished, we will be mounting the headboard pretty high off the ground so that it will be really dramatic! Right now it is just sitting on the floor. I will do another updated post once we get the trim attached and I am also planning on doing another before and after post of the entire bedroom, since this is pretty much the last room we’re tackling 🙂 What do you think so far?
**See an update on this post here!**

How were you able to mount the headboard if the bed frame goes with it? or did you have a separate bed frame before getting the headboard?
Hi Elizabeth!
We have a standard metal bed frame that is completely separate. The headboard is not attached to anything else except the wall!
Not relate to the headboard, but I see the curtain panels in your bedroom have the rings in oil bronze rubbed (or a dark color)….do you mind letting me know where you bought them? We moved recently and the house already has the rods in oil bronze rub (or dark color) and I’m having a hard time finding curtain panels with the metal rings on it other color than silver…
Thanks
Hi Lilly!
My bedroom curtains are the Union Square Curtain Panels from Bed, Bath, and Beyond. I am including the link for you here. They come in many colors, so hopefully they will have something you like! And make sure you use a BBB coupon, never pay full price 🙂
http://www.bedbathandbeyond.com/store/product/union-square-window-curtain-panels/3171689?categoryId=12198&skuId=14885684