Photoshop Fun: Charleston Bedroom

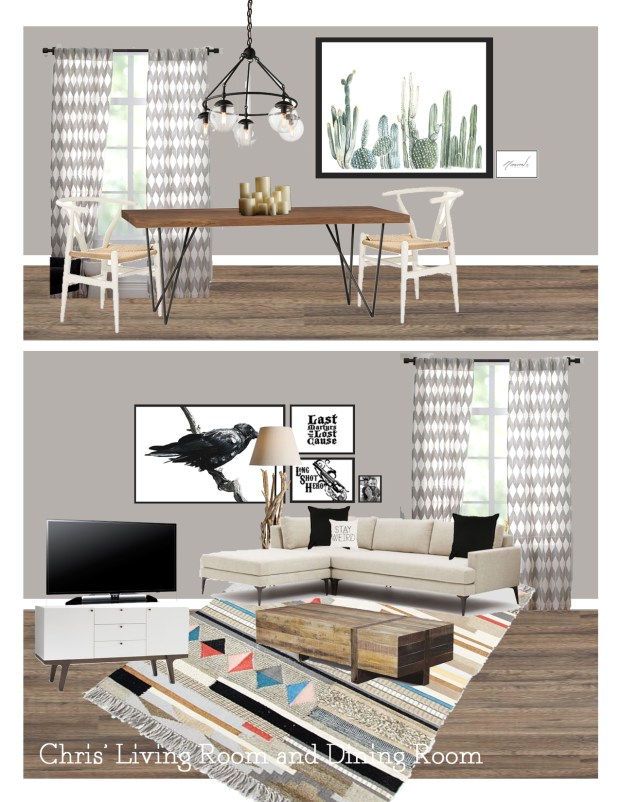
Hope you enjoyed my Living Room reveal!

Now, I want to show you my Bedroom. First, I want to share some overall photos, so you can get a better idea of how the room looks!


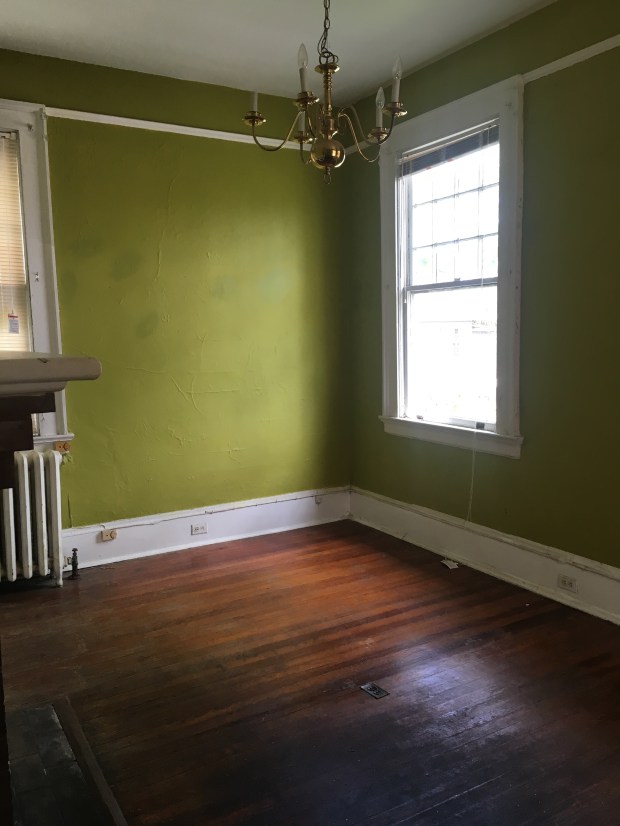
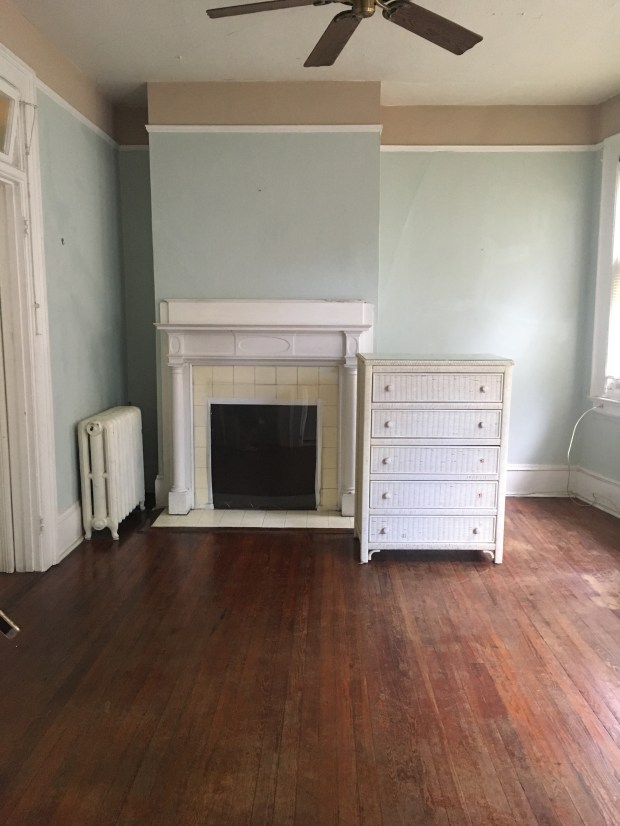
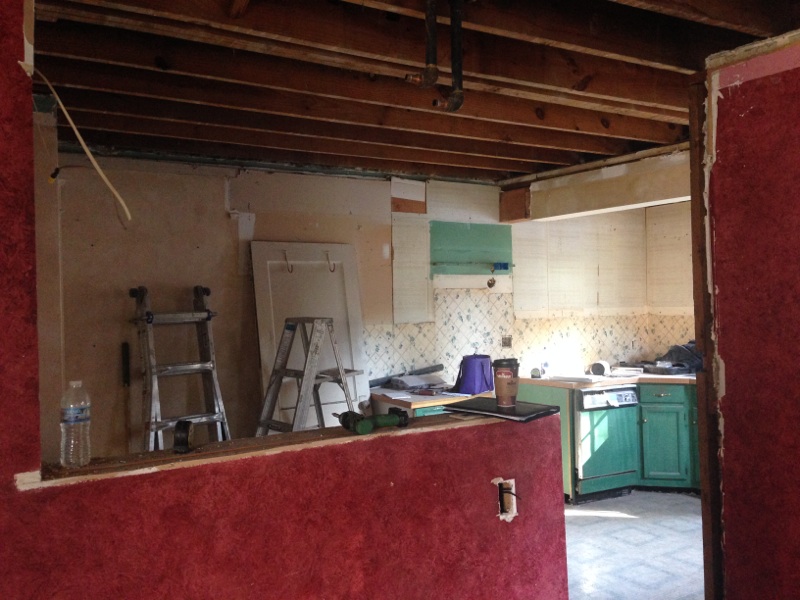
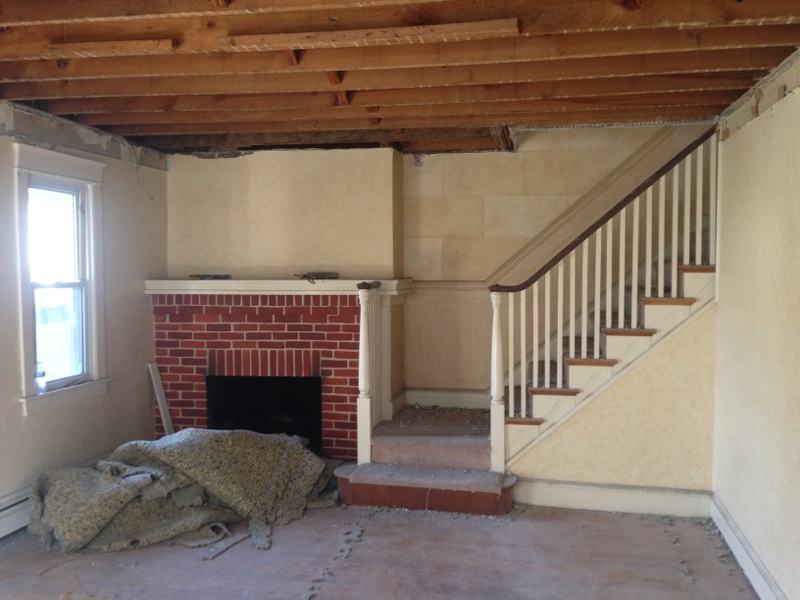
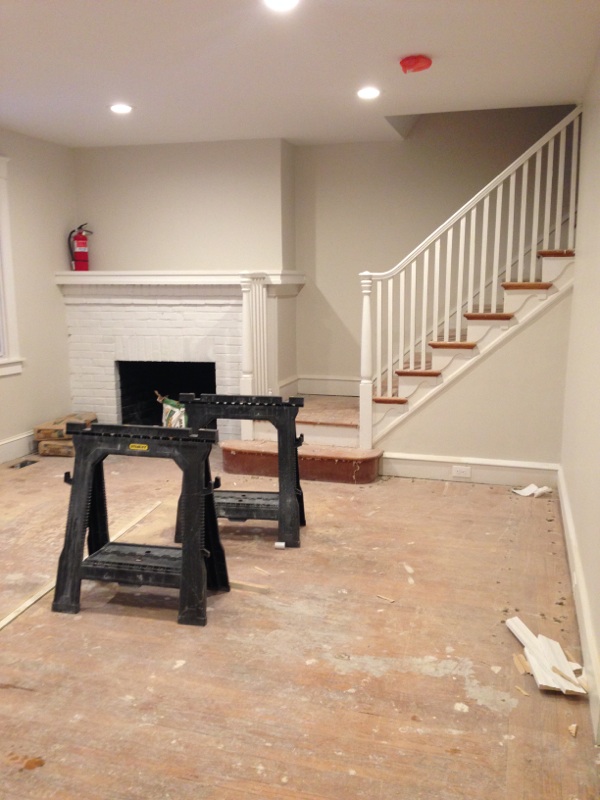
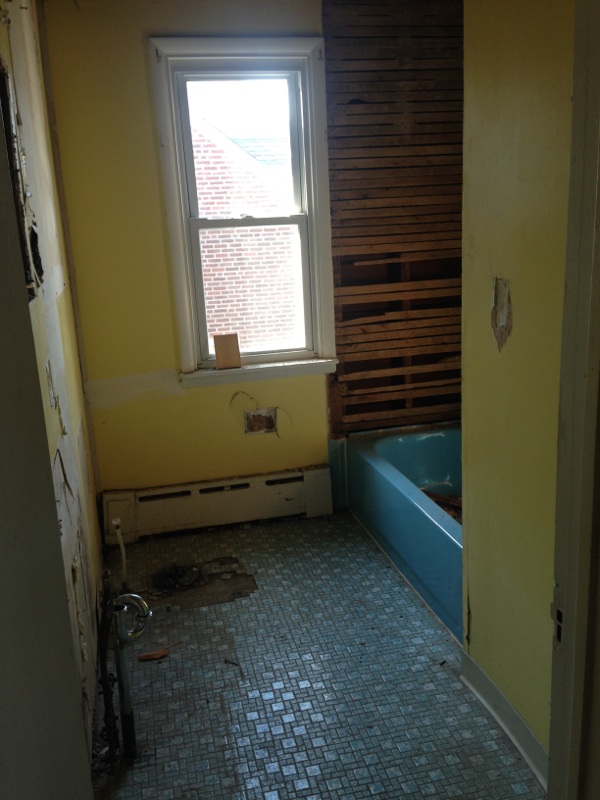
How do you feel about those green walls?? And the tiny sink in the corner, because there’s no sink in the bathroom 😳 But the fireplace is SO cozy! So, let’s see the BEFORE and AFTER.

I’m thinking of having the walls painted bright white, along with the trim – and I guess the fireplace too (still figuring that out) and painting the upper part of the walls above the picture rail in a soft blush. All of the furniture is my own, with the addition of the same long white linen drapery that I used in the Living Room. The ceilings are super tall and my current curtains are too short! I’ll replace my bedding with a fresh, white duvet or quilt, and crisp shams. See that little gold pineapple mirror? I just snagged it on sale from Michael’s a few weeks ago. And it’s currently on sale again for $11.99! I thought it was so perfect for Charleston, but still looks classy, not kitschy.

I’m thinking of using Velcro to add a beige linen skirt under the sink to hide a basket with my straighteners, curling irons, and brushes, since I’ll be getting ready in my bedroom. You’ll understand once I share my bathroom reveal…

Thanks for staying on for the tour! Stay tuned for more soon!

❤

SaveSave

SaveSave

Advertisement

Photoshop Fun: Charleston Living Room

Hi Ya’ll!

I KNOW you’ve been patiently waiting to see some BEFORE & AFTERS. Am I right? Well, today is your lucky day!

Check out the Living Room BEFORE. Not loving the 2 tone walls or the yellowy tile on the fireplace. It just needs some love!Heck yasss!! Now that’s an AFTER!

I “painted” the walls a soft griege – actual Sherwin Williams color to be determined! I freshened up all of the trim and used black paint over the yellow tile to make the firebox appear larger. Then I just added my own furniture and a *few* new pieces 🙂

I hope you feel just as sophisticated as I feel when I come home!

Photoshop Fun: Symmetrical Face Study

A few years ago, I read an article about an artist who took photographs of volunteers and then Photoshopped their faces to see what they would look like if they had symmetrical faces. It was fascinating to me. Check out this article and this one BEFORE you look at my photo…

Some people tell me I look like my mom, others say my dad, some, including myself, don’t see much of a resemblance to either one. But after doing this study, I couldn’t believe it.

One half of my face looks JUST like my mom, the other half my dad. Mind blown.

Take a look:

❤


Photoshop Fun: Iron Man’s House

house 1 new
Iron Man bought a house!! I am so proud of him for accomplishing one of his life’s goals. It’s such a cute, sweet place, all it needs is just a little love and care 🙂

Here are some of the Before’s…

Living Room:house 2 newhouse 3 new

Dining Room:
house 8 new

Kitchen:house 4 new

Master Bedroom:house 5 new

Main Bathroom:house 7 new

Guest Bedroom:house 6 new

I had to slightly photoshop them (quickly and sloppily), for image security purposes, but this is generally how each room looks.

IM has been so kind and let my creativity run wild. I know his style and made sure that whatever I whipped up, was something that he would like. Even if he doesn’t end up using it exactly, it makes for good blog posts!

Here is his Living Room and Dining Room reimagined:

Chris.Living Dining

Here are the details:

Flooring: QuickStep, Reclaime Collection, Heathered Oak Laminate via Lomax

Curtains: West Elm, Sheer Diamond Curtain

Dining Chandelier: Shades of Light, Multi Glass Orb Chandelier

Dining Table: CB2, Dylan Dining Table

Dining Chairs: Modway Furniture, Amish Wood Armchair via Domino

Cacti Print: Etsy, Vertical Cactus Print

Driftwood Floor Lamp: World Market, Driftwood Floor Lamp Base

Sofa: West Elm, Andes Sectional

Coffee Table: West Elm, Emmerson Reclaimed Wood Block Coffee Table

Rug: West Elm, Boho Textured Wool Rug

Entertainment Center: West Elm, Modern Buffet

Raven Image: Deviant Art, Raven Ink Sketch

Since I.M. has 2 months until his current apartment lease is up, his contractor has already gutted the kitchen, ripped up the heinous carpet, installed the crown moulding in the Living Room, and started painting the ceilings, trim, doors, and walls!

I’ll update shortly with some progress shots per room 🙂

Photoshop Fun: Sad Colonial

The Huntress-Photoshop Fun

This small house was down the street from my old apartment. The poor thing is all busted up 😦 I found this Photoshop file in my archive…from when I started virtually fixing it up in 2013! It still needed some touchups, so I quickly finished the work tonight, and now you get to check out the results. Of course there are window boxes, a lantern, and a little peek of stacked stone 🙂

Before:

Sad Colonial Before

After:

Sad Colonial After

Now THAT’S a sweet little place I wouldn’t mind coming home to each night 🙂

Woodland Update and Some Staging Fun!

Hi Followers!

Remember when I blogged about the Woodland renovation here and here? Well, here are some updated photos of the progress!

Kitchen:

IMG_4514

IMG_5258

Living Room:

IMG_4519

IMG_5263

Bathroom:

IMG_4520

IMG_5268

I should have even more to post next week, once the floors have been refinished 🙂

In the meantime, I have come up with a staging plan for this cottage. Now, if I were doing this myself, I would be purchasing pieces that were unique with a traditional-meets-modern vibe. But since we would use a rental company, I am locked into their offerings. Not too bad!

Woodland.AFR

Photoshop Fun: Liz & Bob’s House

The Huntress-Photoshop Fun

My good friend, Liz, and her husband, Bob, just bought a house. Congratulations! It is so cute and charming, but Liz asked me if I could work my Photoshop magic to make this ranch feel more like a home. I hope I delivered!

*I love the snow, but I know how ready Liz is for Spring!

Liz's House BeforeLiz's House After

Photoshop Fun: Woodland Spanish Revival

The Huntress-Photoshop Fun

CK is back at his flipping of the Woodland house. Here’s my Photoshopped version of a brighter exterior. Welcome Home!

Before:

Woodland Before

After:Woodland After


No window boxes or shutter this time, but I here’s what I did:

-Painted the whole facade a brighter cream

-Painted the window trim darker brown

-Painted the front door a deep navy blue

-Replaced the original landscaping with plants traditionally found with a crafts am style home

-“Powerwashed” the roof tiles

-“Powerwashed” the front concrete sidewalk

-Removed the iron porch dividers

-Added a fun star pendant at the porch

-Added an address plaque near the driveway

I hope you like the changes as much as I do!

Photoshop Fun: Andrew’s Row Home

My old grade school friend messaged me to see if I could work some Photoshop magic on his recently purchased row home. Andrew’s house is on the left. As you can see, it blends in with the house next door.

Before:

Andrew's House Before

After:

Andrew's House After

Here’s what I did:

-Added some signature shutters in black

-Painted the basement doors to match the shutters

-Added window boxes

-Replaced the lighting fixture with a new lantern

-Replaced the mailbox

-Put house numbers in the transom window above the door

-Painted the door a warm green (or to really add some extra character, the front door could be replaced with one that has a traditional feel with the door knob in the center, as shown)

I hope you like the updates!

Photoshop Fun: Paint My House!

Once your friends know you are a designer, they can’t help but ask your advice. I don’t mind, I love to help! My friend, CK, has a cute row home, but let’s be honest, it needs a little Huntress love 🙂 Here is the before:

Chris House Before

Yeah, sad, I know…Where are the lanterns? Where are the window boxes??

So here are my After options!

Let’s start with a soft blue for the main stucco paired with a deep navy for the trim:

Chris House After.BLUE


And the second option, a bright cream stucco with classic black accents:

Chris House After.CREAM

And the final option, which happens to be my favorite, a greige stucco, black and white trim, with a welcoming Pumpkin Spice door:

Chris House After.GREIGE

Of course, I know that this may be a little more unrealistic, but I think by adding some simple shutters (from Home Depot, of course), some window boxes (you can use fake flowers), switching out the light fixture for something a little less standard (bring on the character!), actually identifying your house with sleek, modern numbers (easier for the mailman), and staining the front steps (pink stone, what?!), you can have great curb appeal for a little bit of money.

Hope you like your house painting inspiration, CK!