On The Hunt: A New Living Room Rug

Hmmm, I found this post from March. Not sure why it never made it on the blog, but, here it is for your viewing pleasure!

The Huntress-On The Hunt

Lately, at work, I have been looking at rugs ALL DAY. But when it comes to my own rug, I’m having some difficulty!

Originally I had a beautiful tone-on-tone zebra one from Rugs USA (MAJORLY on sale, obviously!) You can see it peeking out from under the coffee table in this December 2012 photo. Here is the exact one, but it is out of stock, so this one and this one are similar.

100_2685I loved this rug, but it was wool and shed shed shed all over the place, all of the time. So, one day in a heated moment, the rug was rolled up and stuffed under the guest bed.

Fast forward a year and I thought I’d try again. So then I found this dreamy jute stunner:

rugs usa.maui chunky loop

I was so in love! I moved all of the furniture out of the way and unrolled this beauty. Immediately, fibers flew everywhere, along with little brown sticks…hmmm

And, it was a little too yellow next to my lovely Montclair Sofa. So, she was quickly rolled up, stuffed into the bag, and shipped back.

Fast forward a few months, and I’m still rug-less 😦 What’s a girl to do?!


Advertisement

Seasonal Switch-Out

Some people just don’t understand the decorating dilemmas that one is faced with when your fun, bright, colorful curtains just aren’t going with Fall and Christmastime decor! The solution is my annual Seasonal Switch-Out! Take a look for yourself!

BEFORE:Apt.Chevron Curtains AFTER:IMG_3999

BEFORE:IMG_3996

AFTER: IMG_3998

Chevron Curtains: Crate&Barrel, Teramo Panels

Blue Floral Curtains: IKEA, Stockholm Blad Panels (not available anymore) similar, similar

My opinion is that the chevron curtains are good ANY time of the year, but it’s always fun to switch things up!

Treasure Hunting

I promised to post about my treasure hunting on Monday, and time just slipped away, so here it is 🙂

I took off of work on Monday to do some Christmas shopping. I was so successful, I had some time left over to pop into some of my favorite shops around my town.

The first stop was Nadeau. This fun shop has lots of unique carved furniture pieces. Take a look!

image_2I want this in a farmhouse entryway. And, yes, when I see furniture, it tells me where it wants to go (mostly “take me home with you!”)

image_1I can picture this carved, sage entertainment center in a pretty beach cottage.

image_3
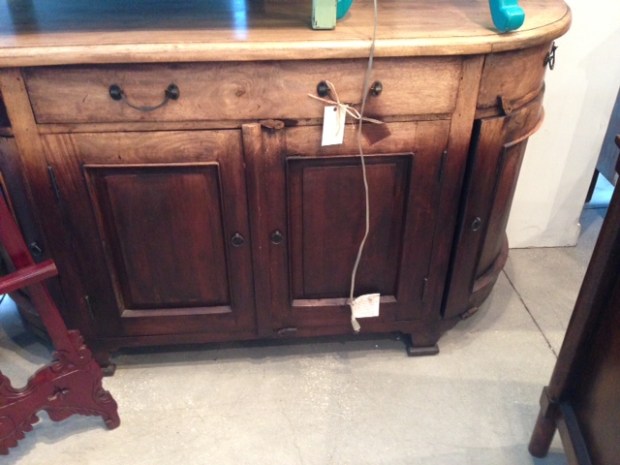
I’m not loving the curved shape of this, but check out the ombre staining. Really interesting!

image_4
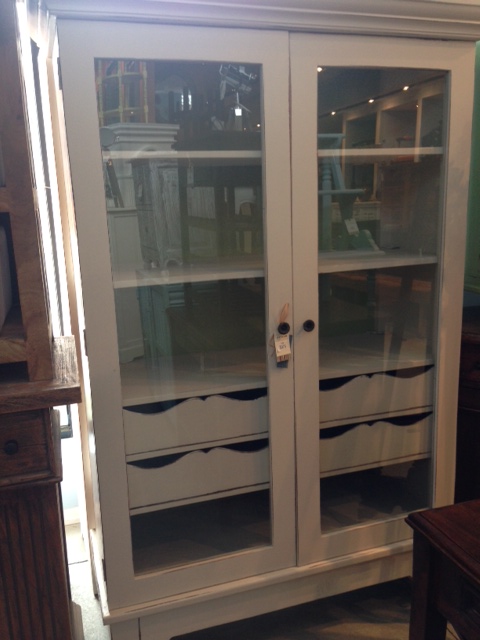
Shoes, hats, scarves, mittens, mail, books, files-whatever it is, I want to label the heck out of this thing and put it in my office…if I had an office. This is why I need a bigger place, so I can put all of my furniture inside!

image_5Lingerie cabinet? Or swanky linen closet?

image_6This piece doesn’t even need words. I mean, look at it!!! It is actually open on the back, but it’s sitting up against a glass wall. It’s so pretty and industrial, I would want all of my white stoneware collection displayed on it. *sigh*

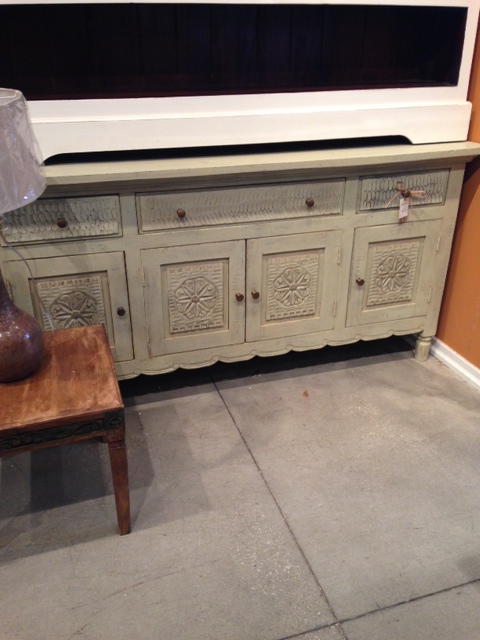
And this little carved wonder was a “steal” compared to this one from Anthropologie.

image_7
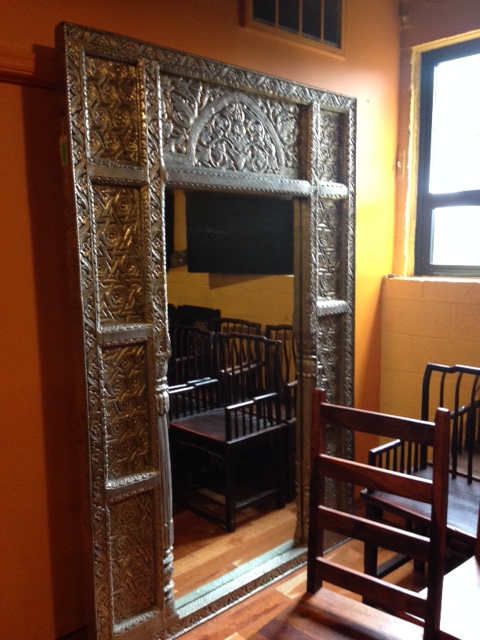
The prices fluctuate between overpriced for some pieces and reasonably priced for others. But as you can see, they have some unique items, including this beautiful statement mirror that may or may not eventually come home with me…

image
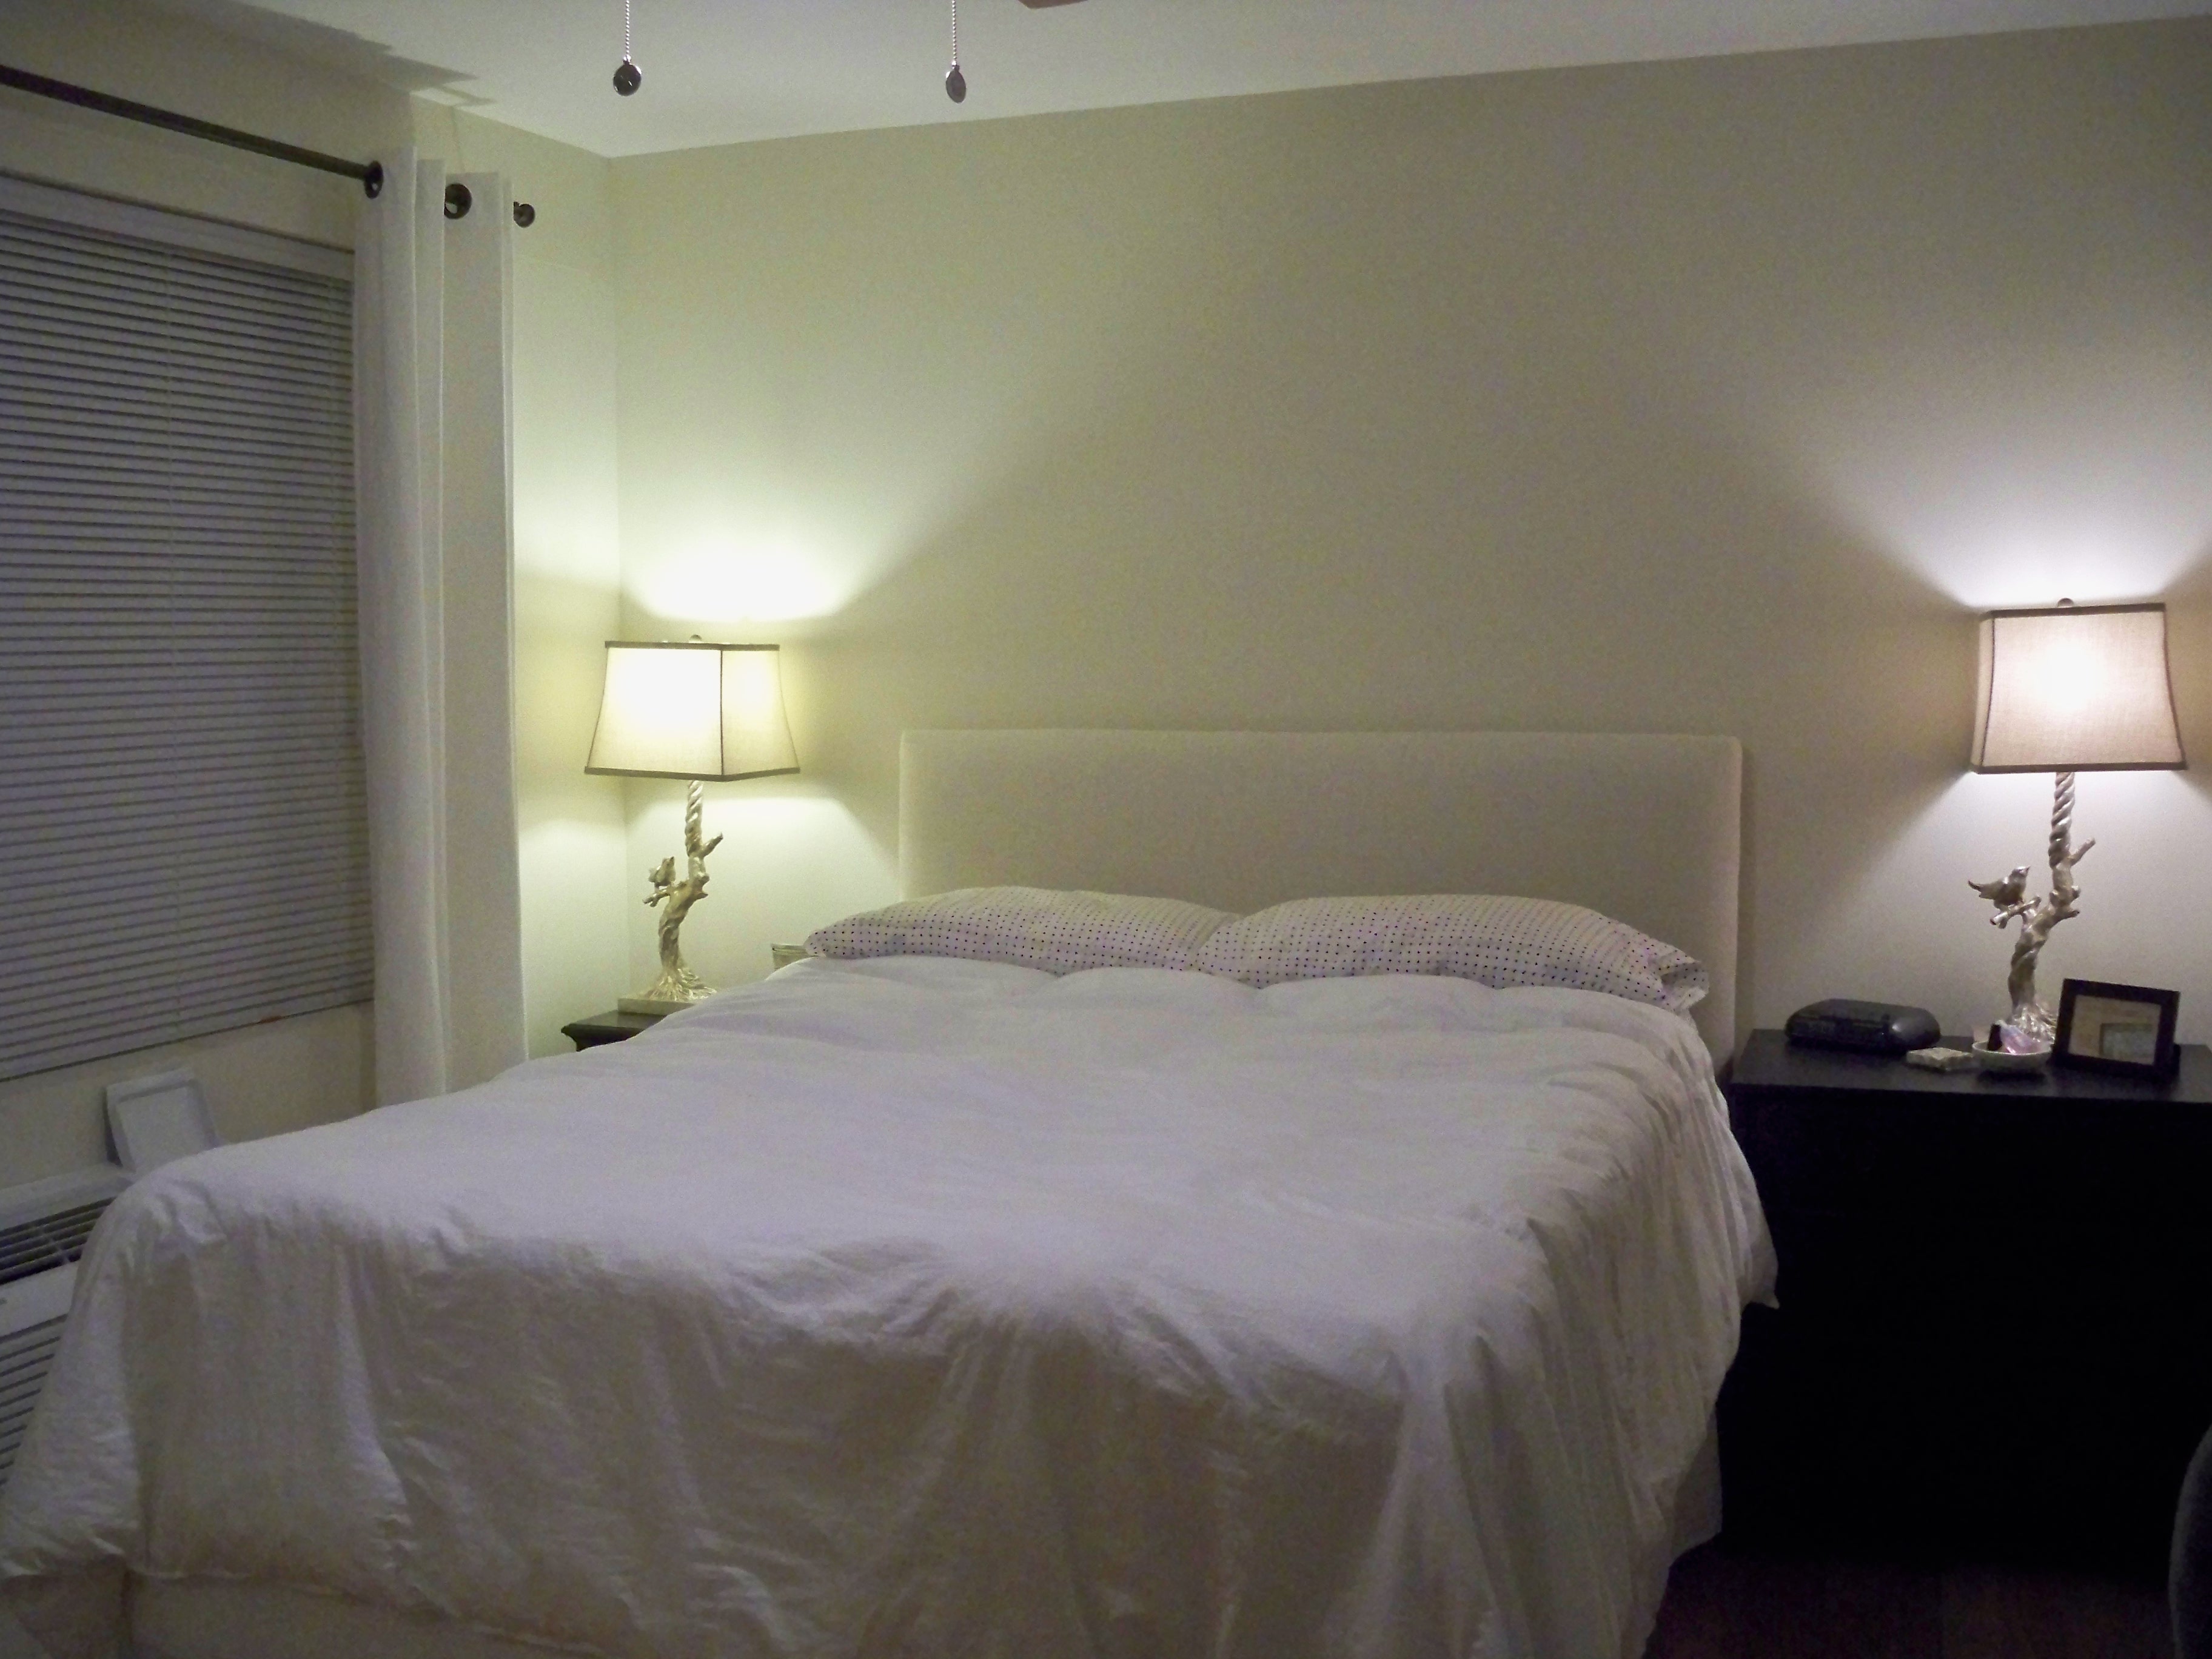
It has the most intricate bird carvings, which will match my bird lamps in my bedroom. And you can’t tell, but there is a beautiful gold sheen which gives it just the right amount of elegance.

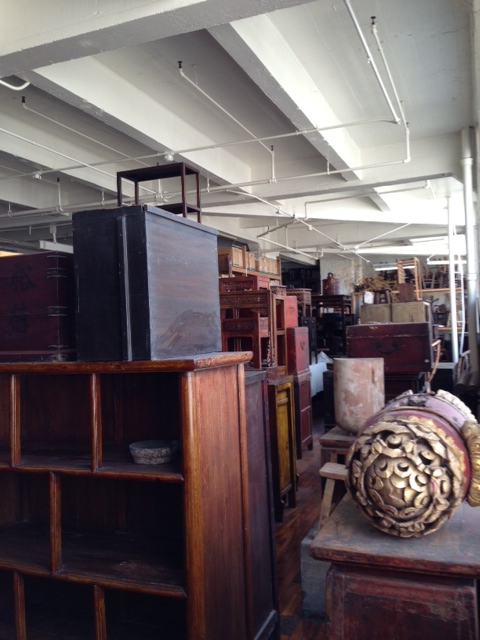
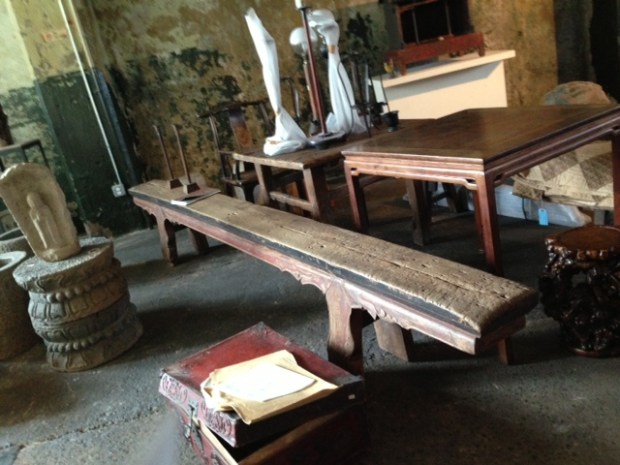
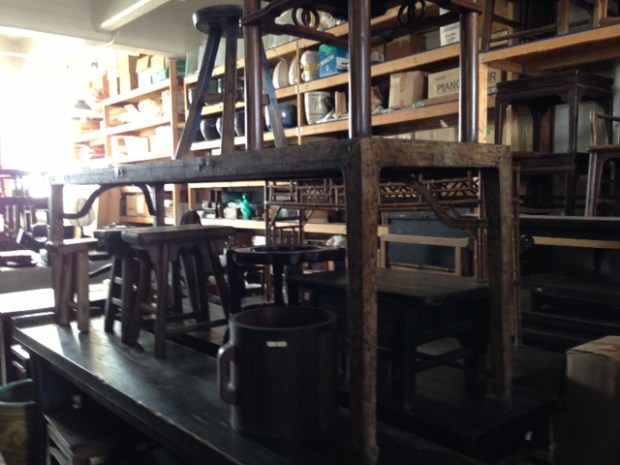
Once I left there, I couldn’t help myself, I just had to stop at Material Culture, which is only the coolest place ever. At least, it makes me feel cool because I know about it. “Material Culture? Oh, yeah, I go there…”

image_10
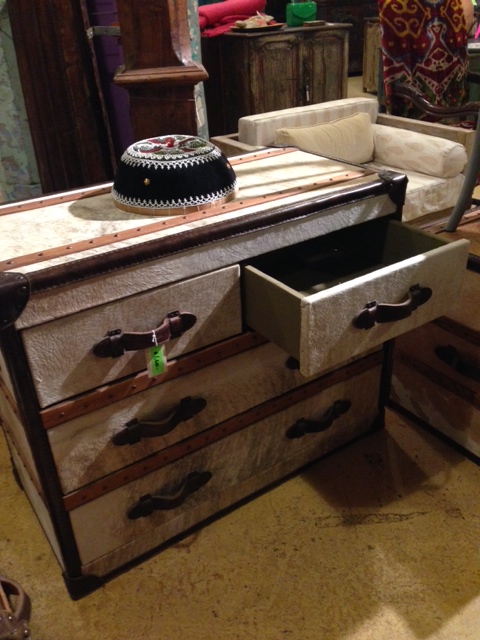
It’s a huge warehouse space with so much good stuff packed in, you can’t even see all of it! Lots of their items are antiques from China, India, and Africa. They have newer things too, like this fab trunk that was fully upholstered in cowhide. Even the drawers were lined in an army green felt. And they shut so smoothly, no wobbling. *swoon*

image_15

image_13This amazing carved doorway, probably from 19th century India, was only $5,000. That may sound sarcastic, since I’m always on a bargain hunt, but seriously, if I was renovating, that seems like a small price to pay for such a dramatic impact. Look at Genevieve Gorder’s apartment reno. As soon as I saw this, I thought of her amazing bedroom doorway 🙂

image_11Imagine brushing your teeth in this Italian-eque double sink every morning!

image_8 image_9
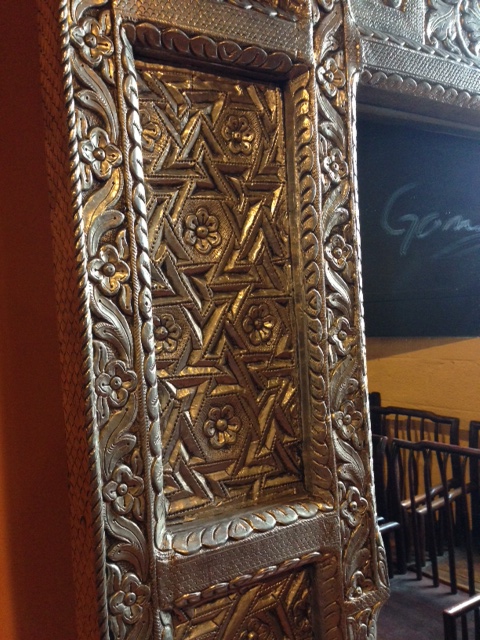
This stately carved mirror was so pretty in person, I had to take a close-up. See all of the detail? No reflection could compare…

And now, the piece de résistance…

image_14
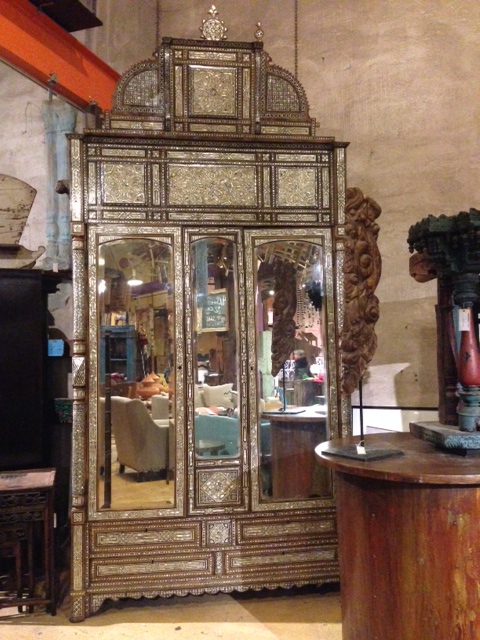
Ummm, yeah, I just fainted, came to, then fainted again. I don’t have  a close-up of this, but it is completely inlayed with mother of pearl and is just absolutely magnificent. It must be 11′-0″ tall. I just want to stare at it all day…

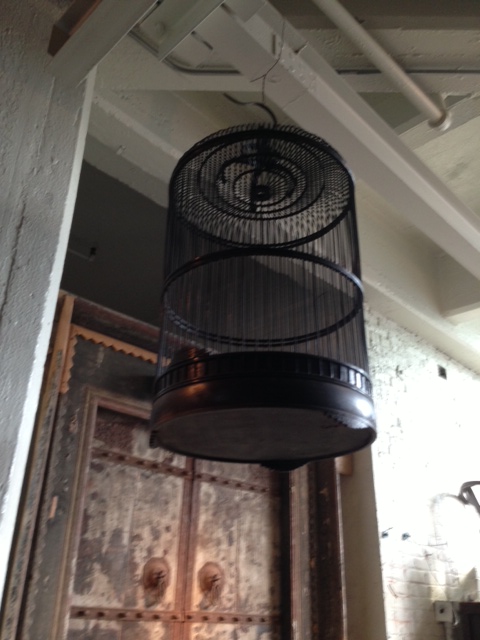
I saw a lot of beautiful things, and then I saw this:

image_12Hmmm…

There is one more place that I must mention in this post. The Liao Collection in Center City, Philadelphia. I was there a few times last year and have to share the photos with you. It is similar to Material Culture, in that most everything is antiques. These are all Chinese and Japanese antiques and you know that every piece has a story.

image_2

image_12

image_6image
image_7
image_4 image_5

image_13image_14image_10image_9image_11

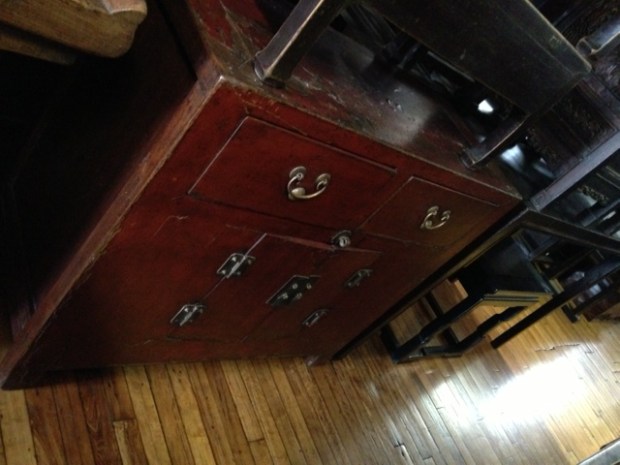
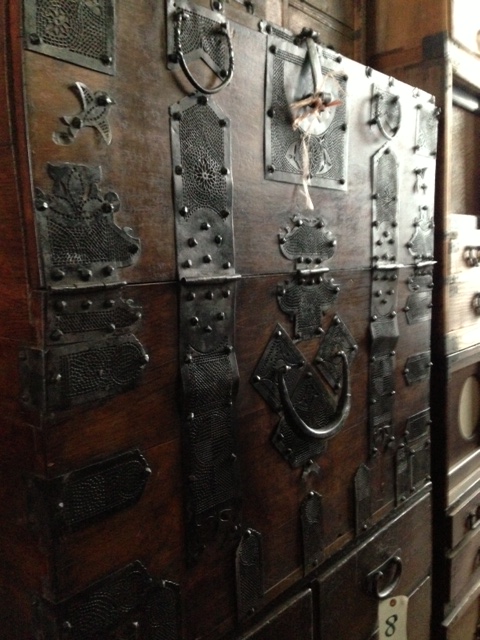
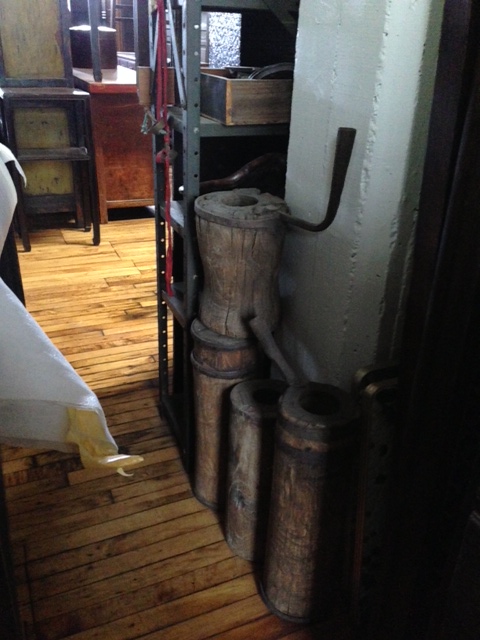
I actually purchased this Japanese chest ($1500) and the tofu mold ($500) for work. The chest is definitely one of those items that I would consider buying from work. It is just so old, you know it wants to say something. Unfortunately for me, it only speaks Japanese…but I can appreciate it’s good looks!

image_3

GT Goldteximage_1

GT Goldtex

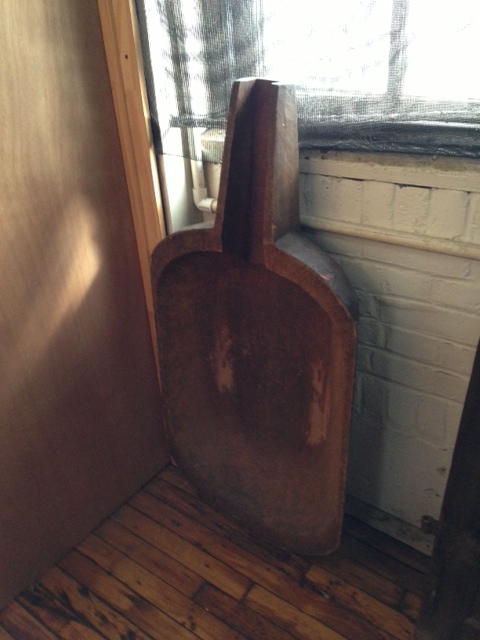
Now you can say you’ve seen a tofu mold in a shower…Woo Hoo!!
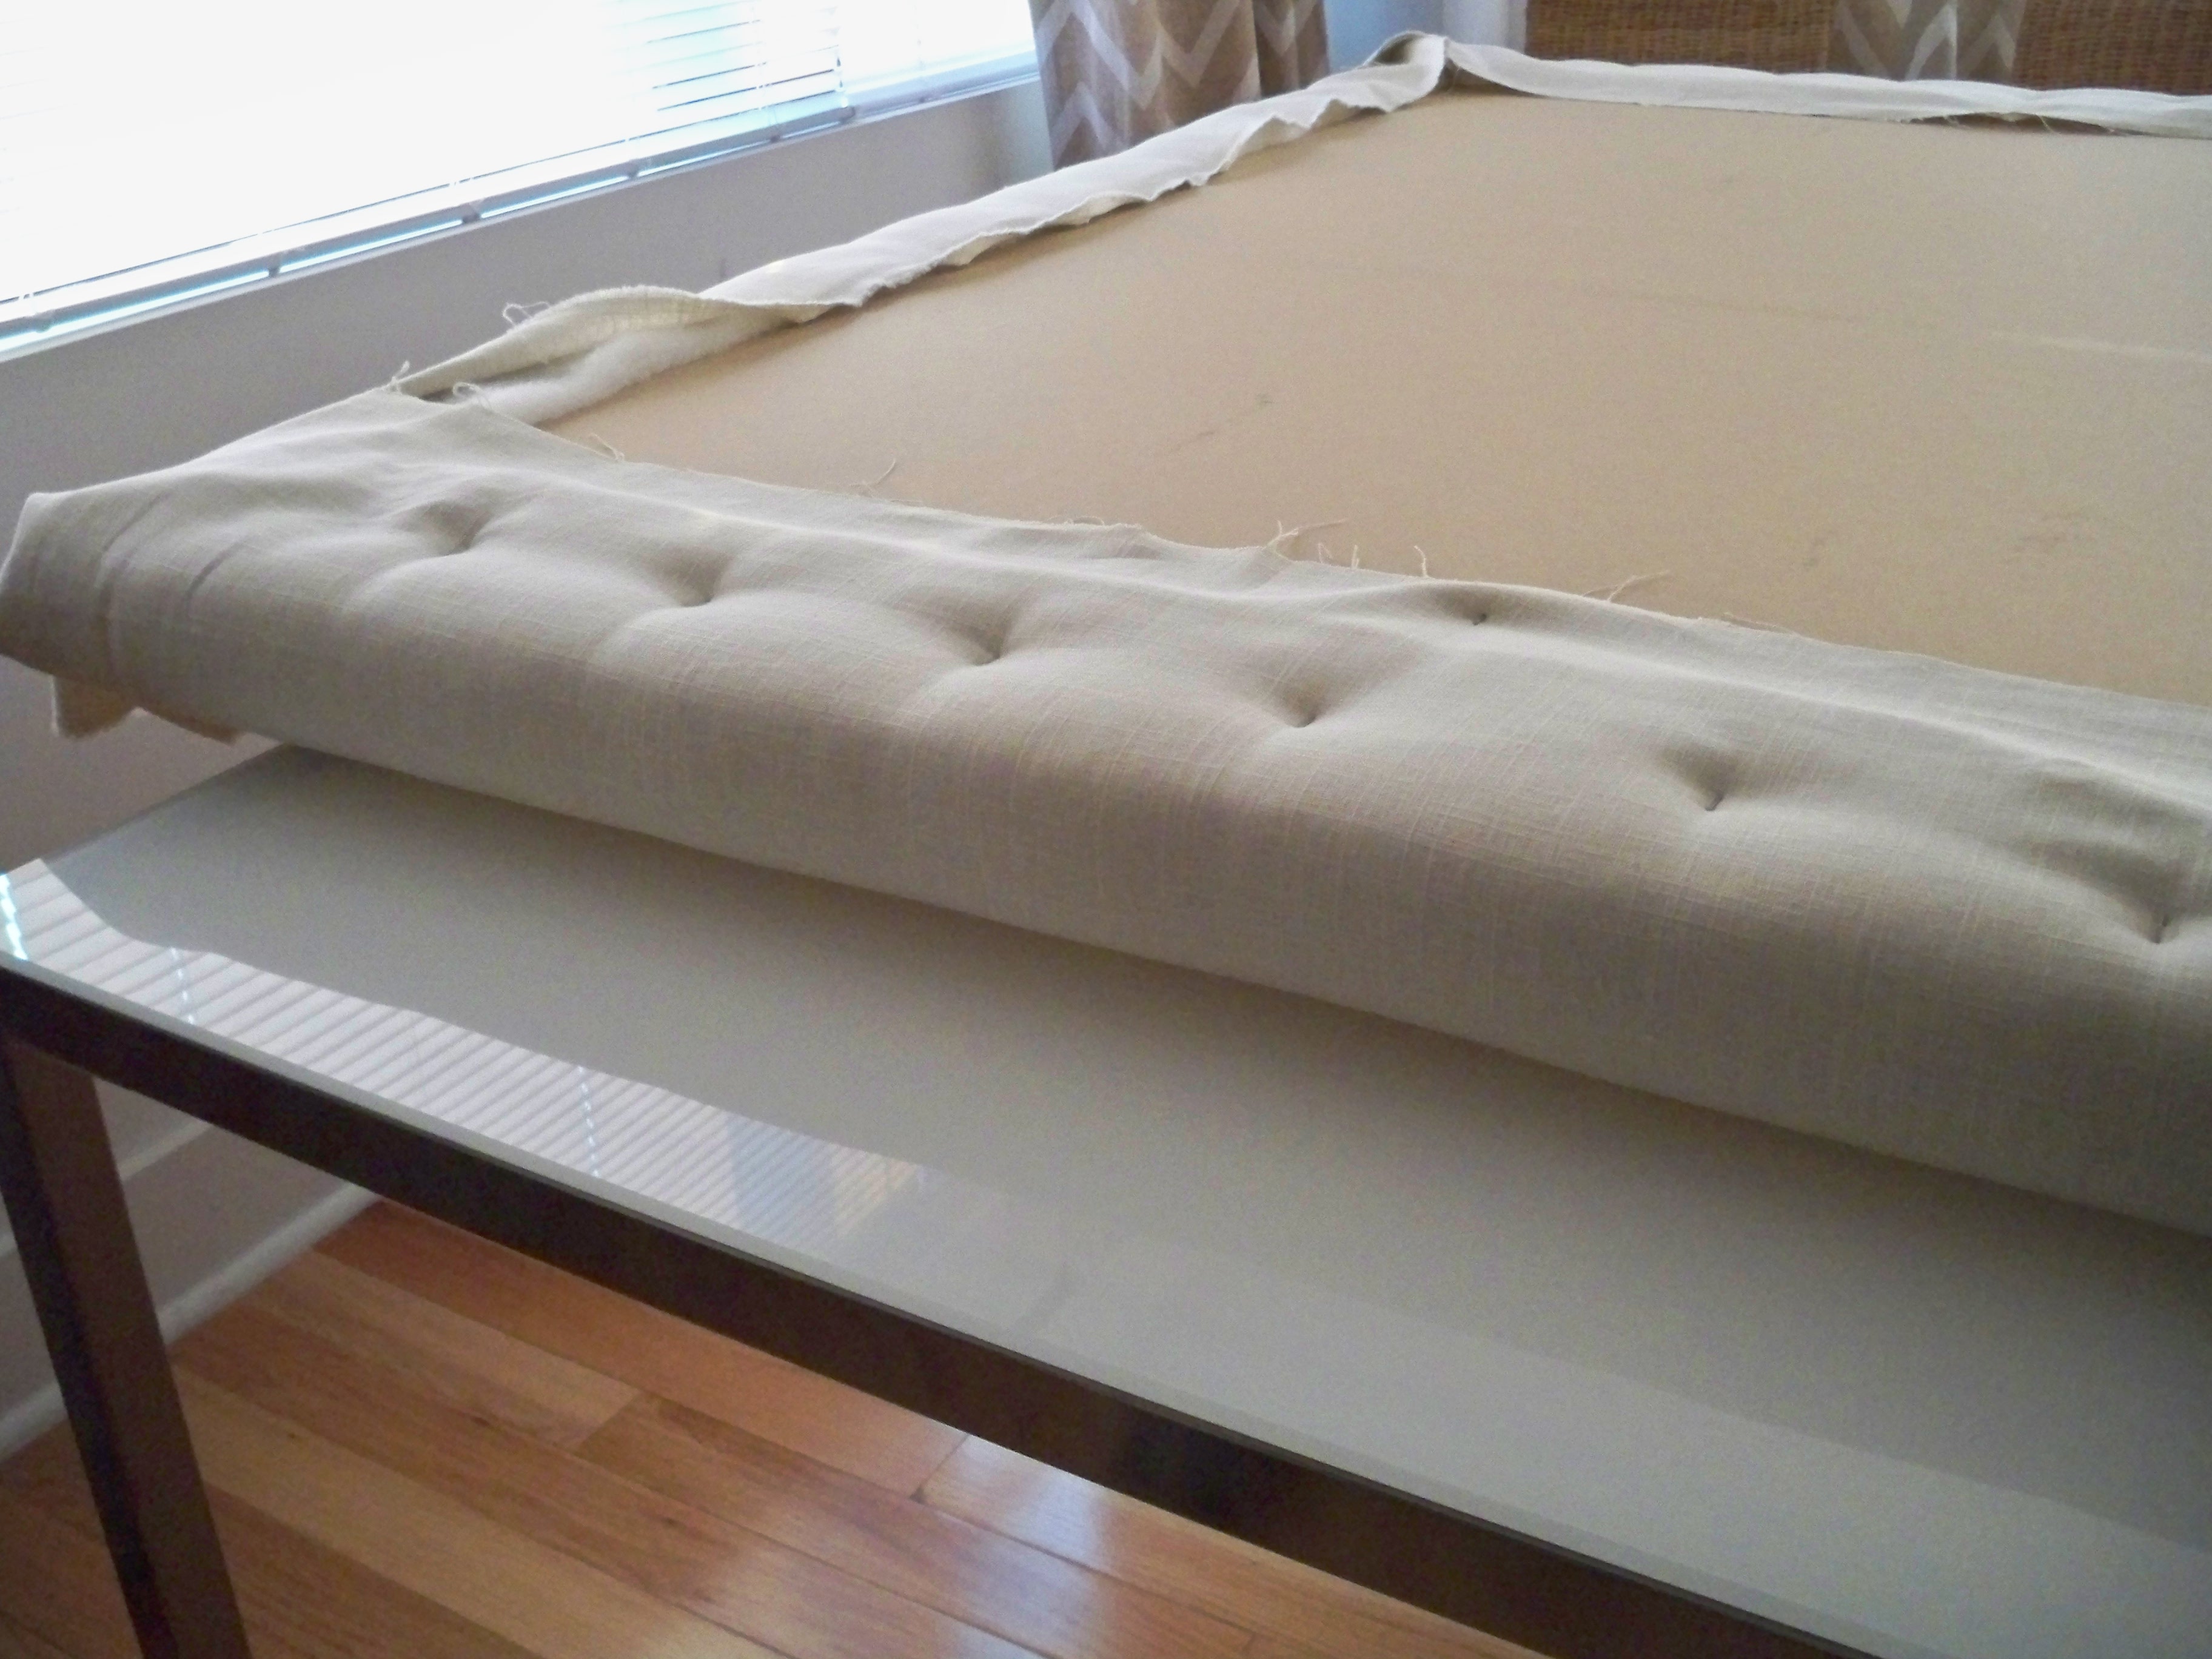
 

Christmas and Candles

image_7

Last weekend, my friends Suzy, Sarah, and Ashley and I went to the Christmas Tree Shops. Have you ever been? It was pretty glorious. It was like a grocery store with holiday decor!! (they even had food too, all the way in the back!)

image_8

Look at these little jack-o-lantern and ghost wreaths, for only $4.99!

image_10

And this miniature Christmas tree for $1.99!!

image_9

Even with all of the good stuff, I found myself only getting some felt hangers for my closet, and this fragrant Pumpkin and Caramel candle for….$2.99!! Wow 🙂

candleThanks for bringing me girls!

Headboard fit for a Queen…sized bed

So you probably noticed the updated headboard in the background of my fashion posts. Last time I posted about this, we left off here:

100_2817

But now, we have finished the headboard! But as you can see, not the whole bedding situation…

image_6

We started out using this trim, which I purchased from here

fabric farms nailheads

We just laid out where we wanted the trim to go and used our rubber mallet to hammer it into place!

image_1

image_5

image_2

image_3

image_4

So easy! It took us about 45 minutes total to move the headboard out from behind the bed, nail in the trim, and hang it on the wall! We also hung some black and white photos (that we had in our old bedroom) above our nightstands, so it feels more personal 🙂 We definitely have a ways to go, but at least this is looking better!

photo-12

Lets break down the cost:

IKEA Malm Headboard…………….$25.00 clearance

Linen fabric, batting, and mallet…$50.00

Nailhead Trim……………………….$20.00

Mounting Hardware………………..$10.00

GRAND TOTAL……………………..$110.00!!

This definitely beats the $300 one I had been pining after. And because we were able to hang it at whatever height we wanted, it gave us an even more dramatic effect than the more expensive options. We are so happy with the results. It makes us feel accomplished every time we see it!

IKEA Hack: Upholstered Malm Headboard

HJ and I have had this sad IKEA Malm headboard for the past 3 or so years. It was only $25.00 on Clearance, because they discontinued the finish (not surprised, it’s soooo boring…)

100_2792

I had always planned on doing something else with it, but just couldn’t decide what I would like best. So a few weeks ago, HJ and I went to the fabric store and bought 2 layers of batting and a textured linen fabric, for less than $50 bucks. Score! 🙂

Here’s how we did the transformation:

1. We read a ton of other blogs that did it before 🙂

2. We measured and added about 5 inches to the sides and top so we would have enough fabric and batting to wrap around the sides to staple

3. We knew we wanted to do a nailhead trim, and several blogs said that the shank of the nailhead wouldn’t pass through thick batting. So, we cut the first layer of batting 1″ smaller all around the top and sides to give padding to the center only. Then, we spray-mounted it in place. We did this step in our well-ventilated storage space in our apartment building, so we wouldn’t ruin our floors or furniture

100_2797

4. Then we wrapped the second layer of batting all the way around and stapled it to the back. We started in the center and worked our way out, as suggested in a few blogs. We also trimmed around the mounting hardware

100_2801 100_2799

5. Next, we just kinda guessed when we did the corners…basically, we cut the extra fabric off and left enough for there to be fluff around the edge

100_2806

100_2805

6. Before we wrapped the fabric, I made sure to give it a good ironing

7. We laid the headboard finished side up, so that we could make sure the fabric lines were straight. We stapled a few staples in the center of each side and top so that the fabric would be secure when we flipped the headboard over to finish stapling. See the nice “tufting” that was created on the back of the headboard with the staples? I really love that effect and wish that we could do it on the front, except that we don’t have anything to hide the staples…hmmm…?

100_2812

8. HJ folded the corners nice and crisp so that I would have nothing to obsess about 🙂

100_2814

9. The fabric and batting didn’t come in a width that was going to cover the entire headboard, but that was OK, because we knew it wasn’t going to be visible. So we just stapled the fabric and batting to the front, no problem!

100_2816

10. Ideally, this is where we would have used our new rubber mallet to hammer in the nailhead trim, but we just ordered it today from here

fabric farms nailheads

We got too excited to see the *almost* final result, so we put it back into place and will put the finishing touches on it as soon as our trim arrives in the mail!

100_2817

And the before again, just for fun:

100_2792

Once everything is finished, we will be mounting the headboard pretty high off the ground so that it will be really dramatic! Right now it is just sitting on the floor. I will do another updated post once we get the trim attached and I am also planning on doing another before and after post of the entire bedroom, since this is pretty much the last room we’re tackling 🙂 What do you think so far?

**See an update on this post here!**

Huntress Headquarters-Holiday Edition

Here is our home all decked out for Christmas! Hope it makes you feel as cozy as it does for us! This is also the first time you are seeing the Living Room/Dining Room/Kitchen all finished. So, I’ll show you some Before and Afters 🙂

Hallway Before:

Hallway

Hallway After:

100_2696

Kitchen Before:

Living 3

Kitchen After:

100_2685

Dining Room Before:

Living 1

Dining Room After:

100_2686

Living Room Before:

Living 2

Living Room After:

100_2701

And some more just for fun!

100_2690 100_2698 100_2691 100_2687 100_2685

Good Idea Confirmed!

We are  I am beginning to decorate for Christmas around here. So, to prolong some of my seasonal decor, I am repurposing some of my fall items.A few months ago, I paired a petite manzanita branch I bought at HomeGoods for $12.99 (much to Hunky J’s confusion “Why do you need to buy a branch when you can get them outside for free?!”) with an ominous black crow found at Michael’s for about $2.00.

But to answer your question, Darling, it’s because this one is aptly sized for vignettes, perfectly smooth, so we won’t have creepy bugs hiding in peeling bark, neutral enough so I can use it for all seasons, AND, because I saw it at HomeGoods, wanted it badly, but restrained, went back 2 weeks later and found it nestled in between a fake fern and a seashell encrusted picture frame 🙂

100_2610

I decided that I would relocate Manzi to another shelf in our kitchen, where she could make friends with a sweet little cardinal bird I got when HJ and I were in Peddler’s Village with our friends last month.

100_2673

So cute! He just clips right on, and he was only $4.99! As a side note, the shop where we got him had a beautiful bare tree with lots of different sized cardinals and owls made of twine and bark perched on its leafless branches 🙂 So pretty and wintry, you could leave it up the whole season long!

To confirm the awesomeness of my simple winter vignette, I came across this photo on Pinterest!

bird branch

source

And that’s why the I’m the MAN-zanita branch 🙂

Hallway!

We FINALLY got some work done in the hallway! Here is a before picture of the hallway leading into our home:

And here is the Progress:


and one more, just because 🙂


The long blue wall opposite Owlie will soon have a picture ledge with lots of family photos. Stay tuned, hopefully HJ will do this for me this weekend, ya know, as an anniversary present!